Labeling for Cottage Food Ops: How We Do It
How Mix n' Batch helps with the labeling problem
Labeling is one of those cottage food chores that feels small until you do it every week. Then it becomes this constant background tax on your brain: Where’s that Canva project? Did I export the right PDF? Did I print the ingredient label or the price label? Why is my printer mad at me personally?
This post is a look at how my wife and I handle labels today, a few other workflows I’ve seen people use (thermal printers, pre-printed labels, etc.), and how the Documents feature in Mix n’ Batch is designed to make labeling less of a side quest.
The goal: consistent labels without extra busywork
Labels tend to do two important jobs:
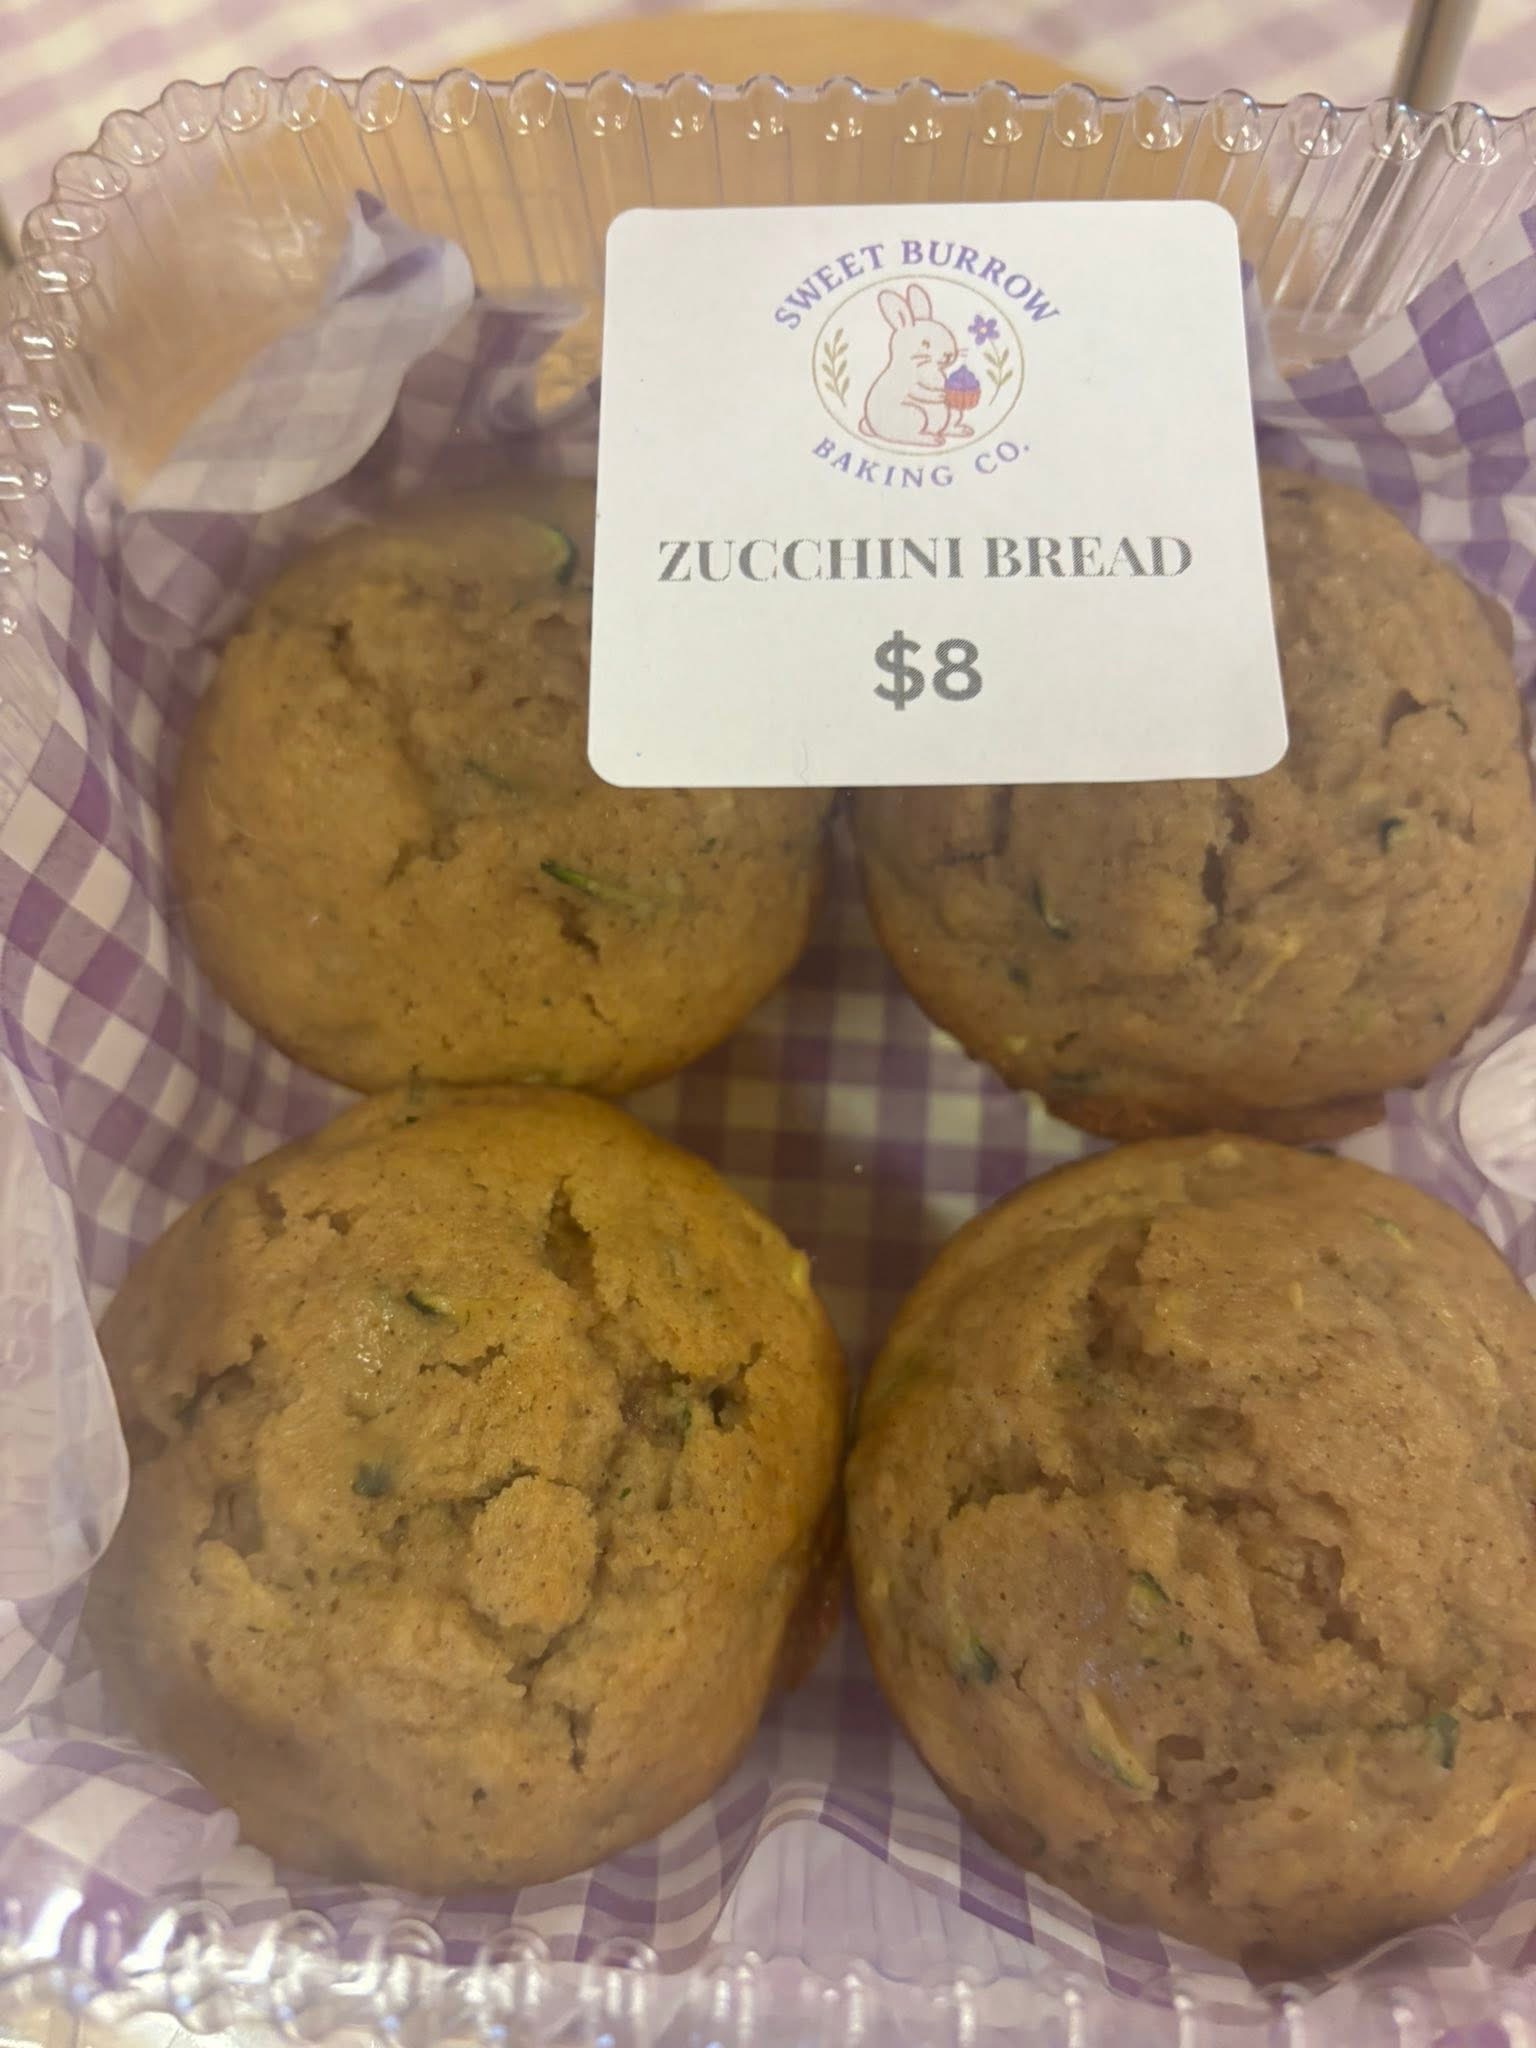
- Customer-facing clarity (product name, price, storage notes, maybe allergens)
- Compliance and accuracy (ingredients and whatever your local rules require)
Even if your labels are already designed, the annoying part is usually the repeat work: finding the file, exporting it again, printing it, and hoping you grabbed the right version.
How my wife and I do it
We went with a setup that uses stuff we already had and keeps the workflow straightforward.
Our setup
- We use a color laser printer we already owned
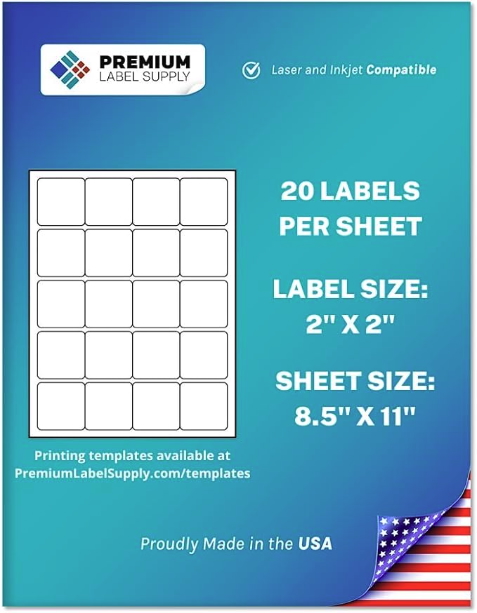
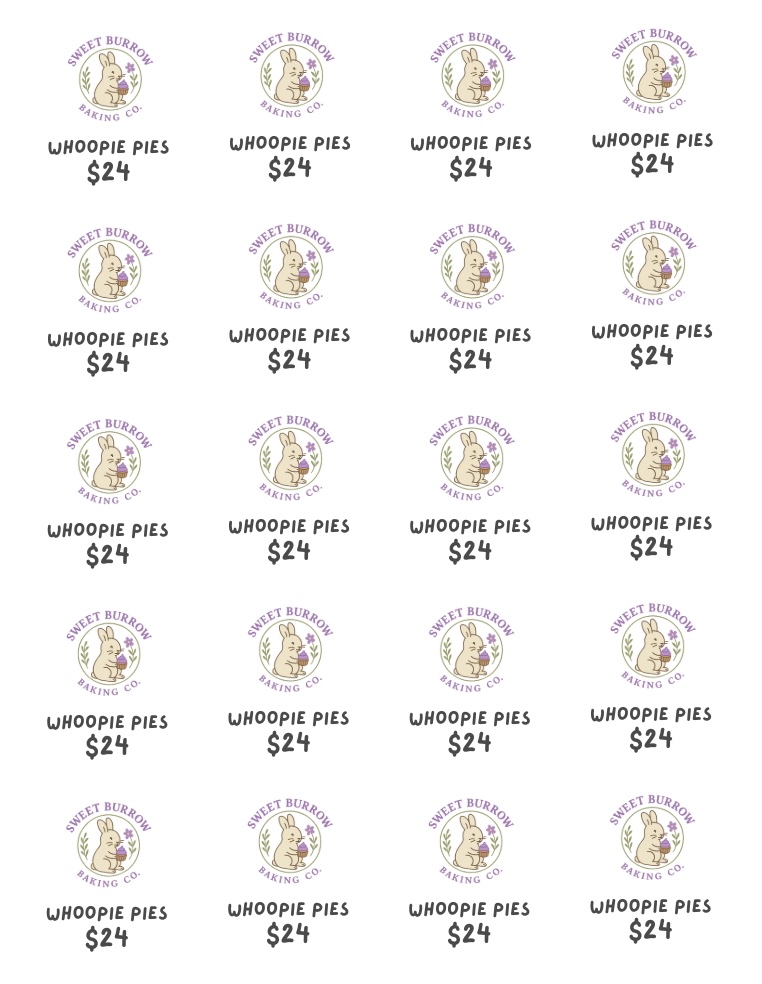
- We use Premium Label Supply label sheets
- 2x2 inch labels for price labels
- 2x2.5 inch labels for ingredient labels
- These label sheets (and many others) come with template PDFs, and often Canva templates too
Our workflow
- We import the template into Canva (one time)
- We design the labels in Canva and duplicate per product as needed
- When we need labels, we update text, download the PDF, and print on the matching label sheet size
This works great, but there was still a pain point: printing labels later meant going back into Canva, finding the right project, exporting again, and printing. Not hard, just a lot of clicking for something you do constantly.
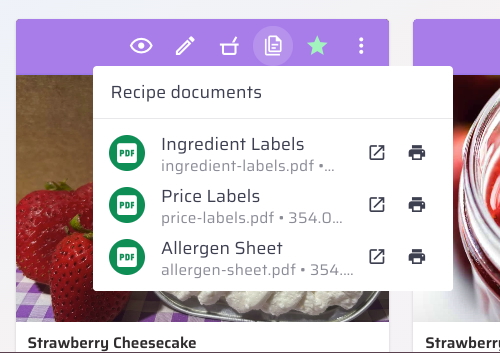
How Mix n’ Batch helps: Documents attached to recipes
This is what the Documents feature is for.
In Mix n’ Batch, you can upload documents directly to a recipe so they’re always right where you need them. From the recipe view, you can:
- View the document
- Print it without hunting it down elsewhere
When you click print, the document opens and your browser’s print dialog pops up immediately. You’re basically going from “I need that label” to printing in a couple clicks, without leaving the recipe you’re working in.
The idea is simple: your label files live with the recipe they belong to, so you stop bouncing between your baking workflow and your “where did I put that PDF?” workflow.
Other labeling setups people use (and why they like them)
Our setup is “laser printer + sheets,” but there are other good paths depending on how much volume you do and how you like to work.
Thermal label printers (fast and popular)
A lot of cottage food folks use thermal label printers with roll labels.
Why people like them:
- Quick printing
- No ink
- Great for high-volume days
Common trade-offs:
- Usually limited to black (no color)
- Label sizes are tied to whatever rolls you keep stocked
- Design tools vary from “fine” to “why is this software like this?”
Inkjet + label sheets (common starter setup)
This is the “I already have a printer” approach, usually paired with Avery-style sheets.
Why it works:
- Easy to start
- Tons of templates
- Flexible for different label sizes
Trade-offs:
- Ink costs can be annoying over time
- Some label materials can smudge if ink doesn’t fully dry
Pre-printed blanks + handwriting (works early on)
This shows up a lot when someone’s just getting started.
Why it works:
- No setup
- No software
- Works at low volume
Trade-offs:
- Harder to keep consistent
- Doesn’t scale well
Outsourced labels (pro look, less flexible)
Some operations order professionally printed labels.
Why people do it:
- Very clean and consistent
- Great presentation
Trade-offs:
- Changes take time and money
- Less flexible if you tweak ingredients, sizing, or packaging frequently
Other ways you can use Documents in Mix n’ Batch
Labels are the obvious use case, but once you can attach documents directly to recipes, a bunch of other workflows get easier too:
- Packaging guides
A one-pager with “how we package this item” (container type, tamper seal, garnish rules, etc.) - Assembly checklists
Especially useful for multi-part items (box insert, sticker placement, bundles) - Market prep notes
Notes like “make 2 dozen minimum,” “display sign goes with this,” or “popular before noon” - Allergen and handling notes
Cross-contact reminders, storage instructions, shelf life notes, “keep refrigerated” signage - Printable signage
Little booth signs or price cards tied to specific products - Customer inserts
Thank-you cards, reheating instructions, storage tips, QR codes for reordering - Compliance references
Any state-specific labeling requirement notes you keep as a PDF or a checklist
None of these are complicated, but they’re the kind of operational glue that makes a cottage food business feel organized instead of improvisational.
Closing thought
If you’re already doing the work to keep your recipes dialed in, labels are just another thing that should stay connected to that recipe. Documents is meant to keep the printing part fast and obvious, so you can stay in your workflow and get on with the baking.
Have ideas about how to make labelling easier with Mix n' Batch? We'd love to hear them! Shoot us an email at hello@mixnbatch.app